deadlift
Romanian Deadlift: Form, Muscles Worked, and Common Mistakes
Learn the Romanian deadlift setup, controlled hip hinge, muscles worked and differences from a floor deadlift, with a video-review worksheet.
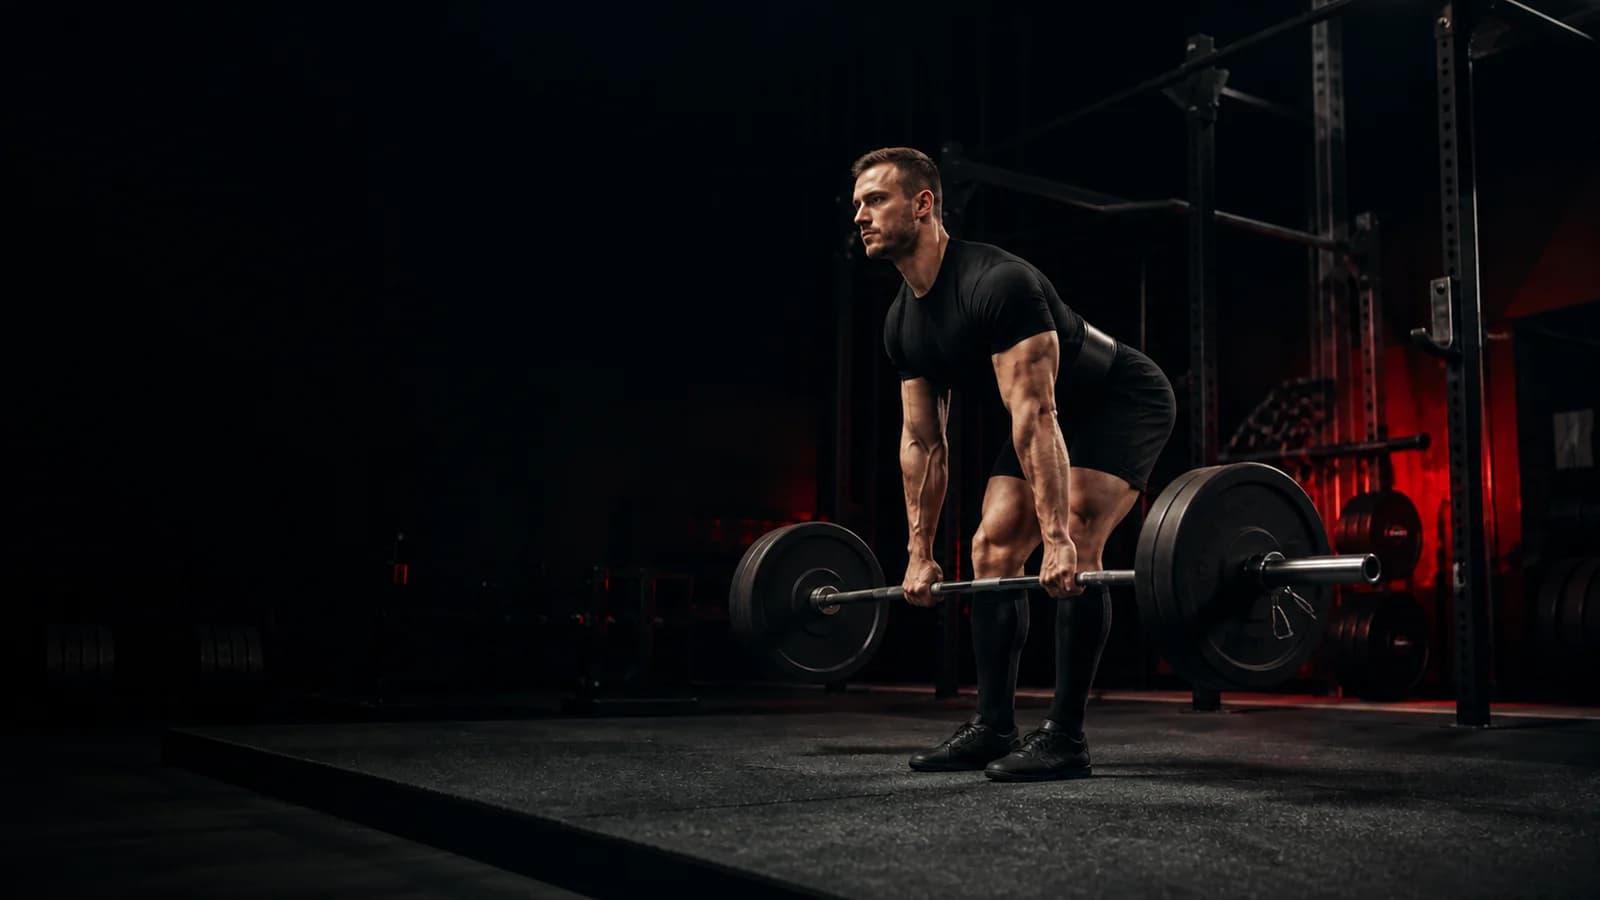
The Romanian deadlift (RDL) is a hip hinge exercise that builds strength and control in your hamstrings, glutes, and trunk stabilizers. Unlike a conventional deadlift that starts from the floor, the RDL starts from a standing position, and you lower the bar only as far as you can maintain a controlled, braced position.
Here is the direct answer: stand tall with the bar at your hips, push your hips back while keeping your knees comfortably bent, and lower the bar close to your legs. Stop before you lose your controlled position: before you would need to round, reach or change position to lower the bar farther. Then drive your hips forward to return to standing. That controlled range, not touching the floor, defines the RDL.
This guide explains setup, execution, muscles involved, how the RDL differs from related lifts, three common trouble cases, a practical video self-review, and a copyable worksheet you can use in your next session.
Setup and Initial Position
Start standing with the bar at hip height. Ask your coach to show you how to take the bar from an appropriately set rack or lift it from the floor into the starting position. The setup lift is separate from the RDL repetitions. Do not clean the bar to your shoulders to start this exercise. Grip the bar with both hands just outside your legs, palms facing you. Stand tall with feet hip-width apart, weight over the middle of your feet. Keep your shoulders back without aggressively pinching your shoulder blades together, brace your core, and soften your knees slightly.
The bar should stay close to your body for the entire lift, but you don't need to drag it up your shins.
Step-by-Step Technique
- Stand tall with the bar at your hips, core braced, and knees slightly bent.
- Push your hips back as if aiming your hips toward the wall behind you. Let your torso lean forward, but keep your spine neutral.
- Let your knees bend a little more as your hips move back. Your knees should track over your toes but stay comfortably bent, not locked.
- Keep the bar close to your legs, not drifting forward. Lower it by hinging at the hips, not by squatting down.
- Stop before you lose your controlled position. For many people the bar reaches mid-shin, but the right depth for you is where you can still hold your chosen trunk position without reaching. It is not always mid-shin, and it is not the floor.
- Reverse the motion by driving your hips forward and standing tall. Finish with your hips extended, not leaning back.
Muscles Worked
During the RDL, your hamstrings and glutes work together to extend your hips as you stand up. Your trunk muscles, including the spinal erectors and abdominals, brace to keep your spine neutral against the load. Your lats help keep the bar close to your body. This exercise does not isolate any single muscle. This guide is training information, not a rehabilitation plan.
RDL vs. Conventional Deadlift vs. Stiff-Leg Deadlift vs. Squat
- Romanian deadlift: Starts standing, ends usually above the floor, knees stay comfortably bent, emphasizes the hamstrings and glutes through hip hinge.
- Conventional deadlift: Starts from the floor with more knee bend, uses leg drive to break the bar off the floor, ends standing with full lockout.
- Stiff-leg deadlift: Usually describes a straighter-knee hinge, but coaches use the name differently. Ask which starting position and range your program means rather than assuming every stiff-leg demonstration matches an RDL.
- Squat: Includes substantial knee and hip bending. Do not treat it as an RDL with the bar held differently.
The RDL is useful when you want to emphasize the hip hinge pattern with a controlled lowering phase. Choose the conventional deadlift when your focus is pulling from the floor, the squat when you want a knee-dominant leg exercise. The NASM barbell RDL demonstration provides a named reference for the standing-start variation. Compare the exercise name in your program with the movement your coach actually wants.
Common Technique Problems and Adjustments
Problem 1: The bar drifts away from your legs. Use the recording to identify when you move the bar away from your legs. Ask your coach to review your setup and chosen load. Do not assume that squeezing one muscle fixes every cause.
Problem 2: You turn the hinge into a squat. If you lower yourself mainly by bending your knees and sitting down, ask your coach to demonstrate the intended hinge again. A side view can help you compare your hip and knee movement, but it cannot tell you exactly how much force each muscle produces.
Problem 3: You round your lower back to reach the floor. If you reach farther by changing your trunk position, end the repetition earlier and ask your coach to choose an appropriate range. Do not force the plates toward the floor or assume that adding load will improve your range.
These adjustments work for many people, but no single cue fixes every cause. If you have pain during the movement, stop and seek qualified help. Pain is not evidence that a particular muscle is weak or tight.
Troubleshooting Three Specific Cases
Case 1: “I feel the movement mostly in my lower back, not my hamstrings.” Do not use the location of a sensation to diagnose your technique or an injury. If you feel pain, stop. If you are unsure about a normal training sensation, explain it to your coach and review the movement before another loaded attempt. You can ask for an unloaded hinge demonstration without turning the question into a self-prescribed corrective exercise.
Case 2: “I can’t keep my balance when lowering the bar.” Put the bar down using the method you learned. Check that the floor and footwear are stable and ask your coach to review the setup before you try again. Do not keep changing stance, knee bend and load simultaneously; you will not know which change affected the attempt.
Case 3: “I can’t tell if my form is okay without a coach.” Film yourself from the side and from a front-quarter angle if possible, with permission if others are visible. Review the video using the worksheet below. Identify one thing that looks off, such as bar drifting forward or knees shooting forward, and focus on changing only that one thing on your next set. The NASM Romanian deadlift demonstration shows a reference form to compare against.
How to Film and Review Your RDL
Place your phone outside the lifting area with enough distance to show your feet, hips, trunk and the entire bar path. Use a side view of a coach-approved practice set. A camera distance or repetition count is not a technique requirement. Watch the video and look for these points:
- Bar path stays close to the legs and moves mostly vertically.
- Spine remains neutral from hips to head at all depths, no rounding or hyperextension.
- Knees stay softly bent and do not travel significantly forward.
- Hips move back, not down.
- The depth at which you stop is consistent and controlled.
Review after each set if possible, or right after the session. Pick one specific change to work on next time. Do not try to fix everything at once.
Fictional Worked Example: Choosing What to Ask
Alex watches a demonstration in which the lifter lowers the bar to mid-shin. Alex then tries to copy that depth even though their own coach has taught a shorter range. In this fictional example, Alex's next action is to ask why the prescribed range differs, not to treat the video as a flexibility target.
Sami records a practice set but cannot see the bottom position because a bench blocks the camera. Sami writes “range not visible” and changes the camera position before the next agreed recording. Sami does not mark the set correct just because the upper half looks similar.
Neither example proves that a particular depth is correct. They show how to separate an observation, an assumption and a question that a coach can answer.
Copyable Worksheet: RDL Observation Record
Use this after filming a set. Mark yes or no for each item. This is an observation record, not a clearance to lift heavy loads.
Setup
- Bar starts at hips, grip just outside legs
- Feet hip-width, weight mid-foot
- Core braced, shoulders back without pinching
Descent
- Hips push back first, knees stay comfortable
- Bar stays close, but not scraping legs
- Spine neutral throughout
Bottom
- Stop before back rounding or bar drift
- No need to force depth to imitate someone else's demonstration
- Depth is consistent with your controlled range
Ascent
- Drive hips forward, not pull with lower back
- Bar stays close
- Finish tall without leaning back
Write down one thing you will change on the next set. Do not score this as a test, and do not increase load just because all boxes are checked. Discuss loading decisions separately with your coach.
Limitations of the RDL
The RDL does not replace the conventional deadlift if your goal is maximal strength from the floor, because it omits the initial leg-drive phase. Your setup, range and program need individual judgment. A video cannot establish why a movement hurts, measure internal tissue loading or clear you to train through symptoms. Seek an appropriately qualified healthcare professional for pain or injury concerns; a training app or general article cannot provide that assessment.
Practical Next Action
After you have learned the exercise and agreed on a practice set, record it with the full movement visible. In Powerlifting AI: Gym Coach, you can review a recorded lifting video and keep your session history together. Upload that clip, note one visible question from the worksheet, and take the question to your coach before changing the load. Use the app to organize your review, not to diagnose pain or certify that a lift is safe.